

Avid photographers face dealing with dozens of albums in the Photos app for macOS, which can be an organizational nightmare. Here’s how to get to grips with organizing your photo albums.
Apple’s inclusion of cameras on the iPhone and iPad make it very easy for anyone to take photographs whenever they want. While it has all but eliminated the consumer compact camera market, what continues to exist is a need to manage all of the images that are produced.
With users potentially creating thousands of photographs each year on their mobile devices, which can be synchronized with the Mac’s Photos app, this leads many to create albums, subcategorizing the image collection into a more manageable state.
However, after managing the images into albums, the problem then becomes managing the albums themselves. Over time, users could end up with tons of albums in their library, and the default ways Photos handles them may not be that desirable.
This guide will explain some of the ways you can get started organizing the albums themselves.
Putting images in albums
The first thing to learn when managing images in Photos is to get them into albums in the first place. In short, you have to create the album and then put the image into it.
How to add images to an album in Photos for macOS
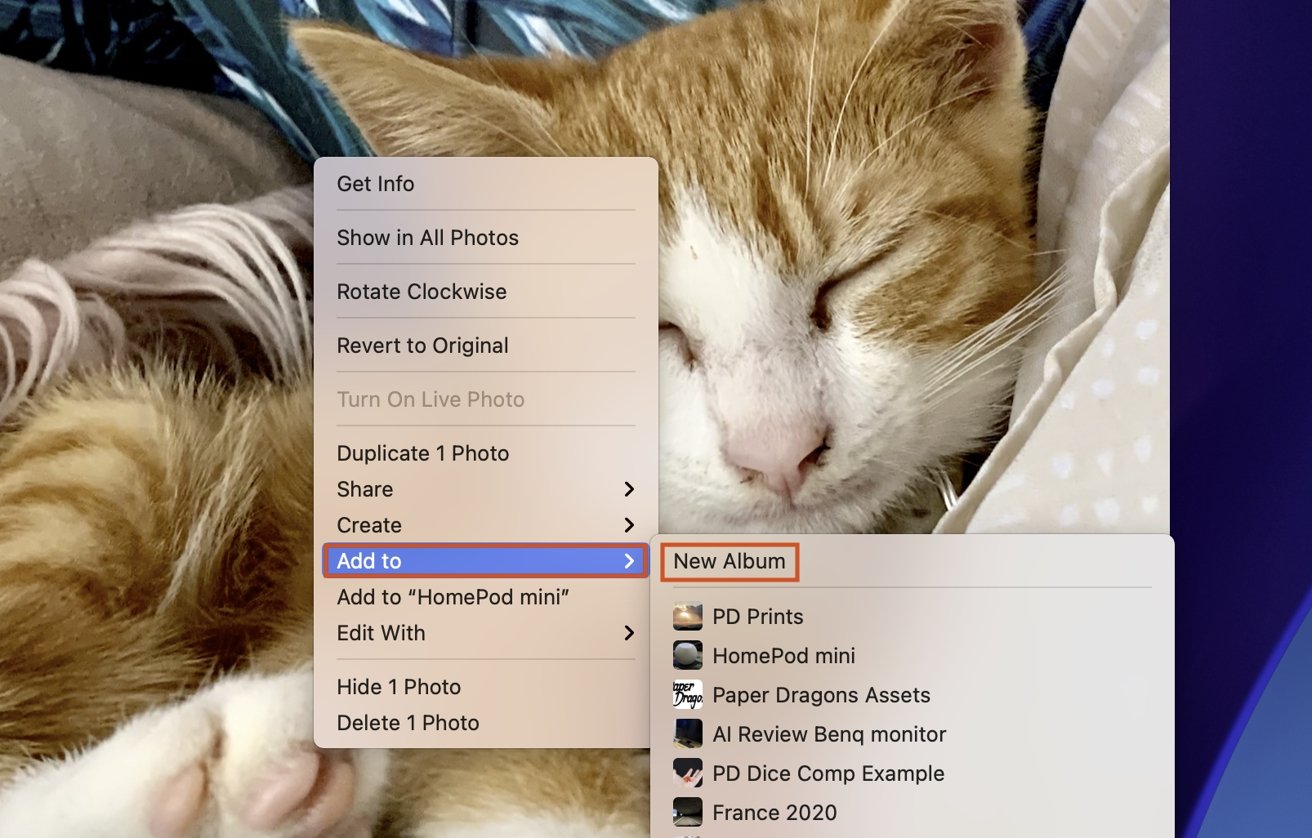
- Select the images you want to add to the album by clicking them.
- Right-click the images, select Add to, then either an existing album or to New Album.
- If a new album is being created, a new album will appear under My Albums in the left-hand side of the Photos app. Click the name and rename it appropriately.
How to remove images from an album in Photos for macOS
- Select the image or images you want to remove.
- Right-click the image, select Remove Photo from Album.
Organizing albums
If you have a lot of albums, you will have to further manage how they are organized, so you can easily see and access the images you want as quickly as possible.
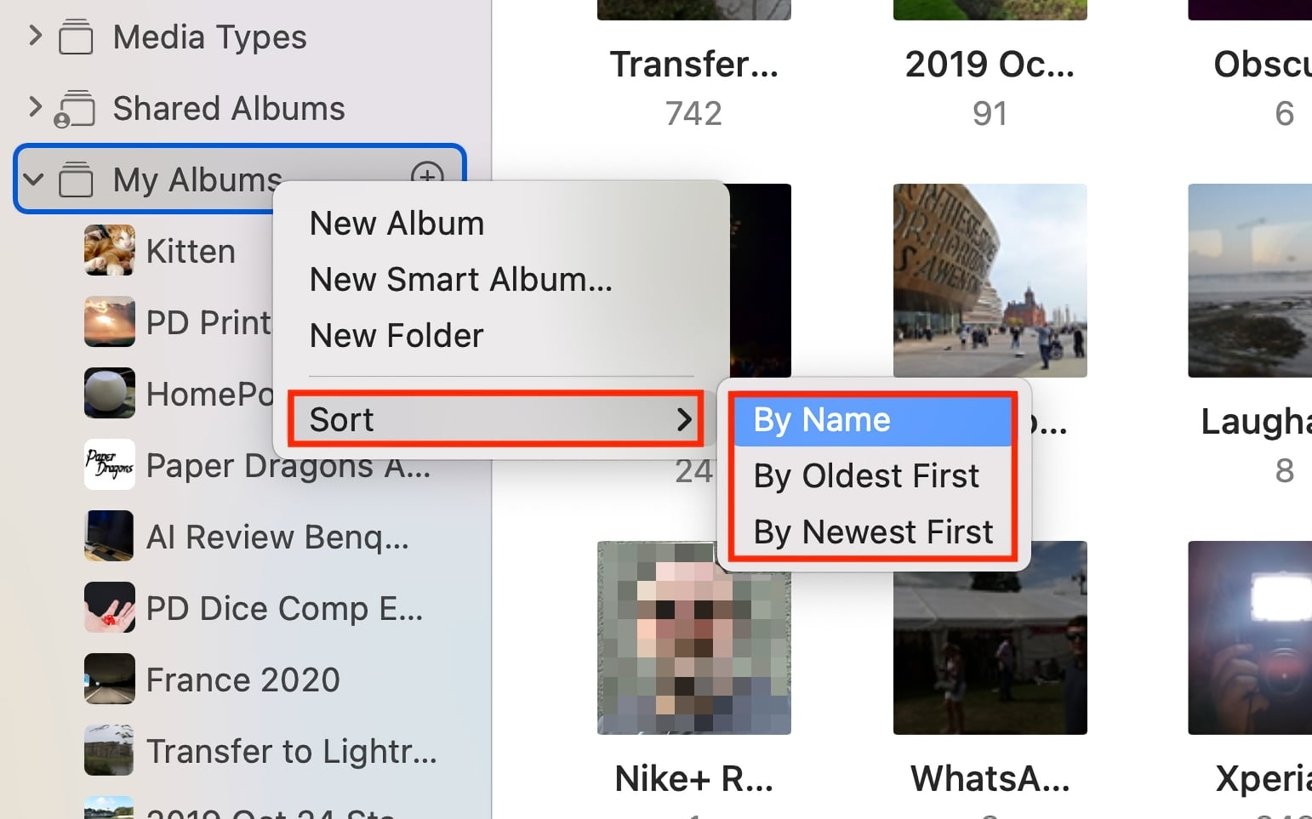
By default, the My Albums section of Photos lists albums in the order they were created. The latest album appears at the top of the list, while older albums appear lower down.
How to change the order of My Albums in Photos for macOS
- Right-click My Albums, select Sort in the contextual menu.
- Select one of the three options: By Name, By Oldest First, or By Newest First.
Newest First and By Name may be the more useful options of the trio, but consider that By Name may be the most customizable.
You have three main ways to change how My Albums is ordered.
For example, the creative naming of an album could alter its position on the list within sorts. Alternately, you could prefix album names by a number.
You can also manually reorder the albums and folders within My Albums by dragging them up and down the list.
If you have a considerable number of albums, and they are categorizable, consider creating a folder within My Albums to put the albums within.
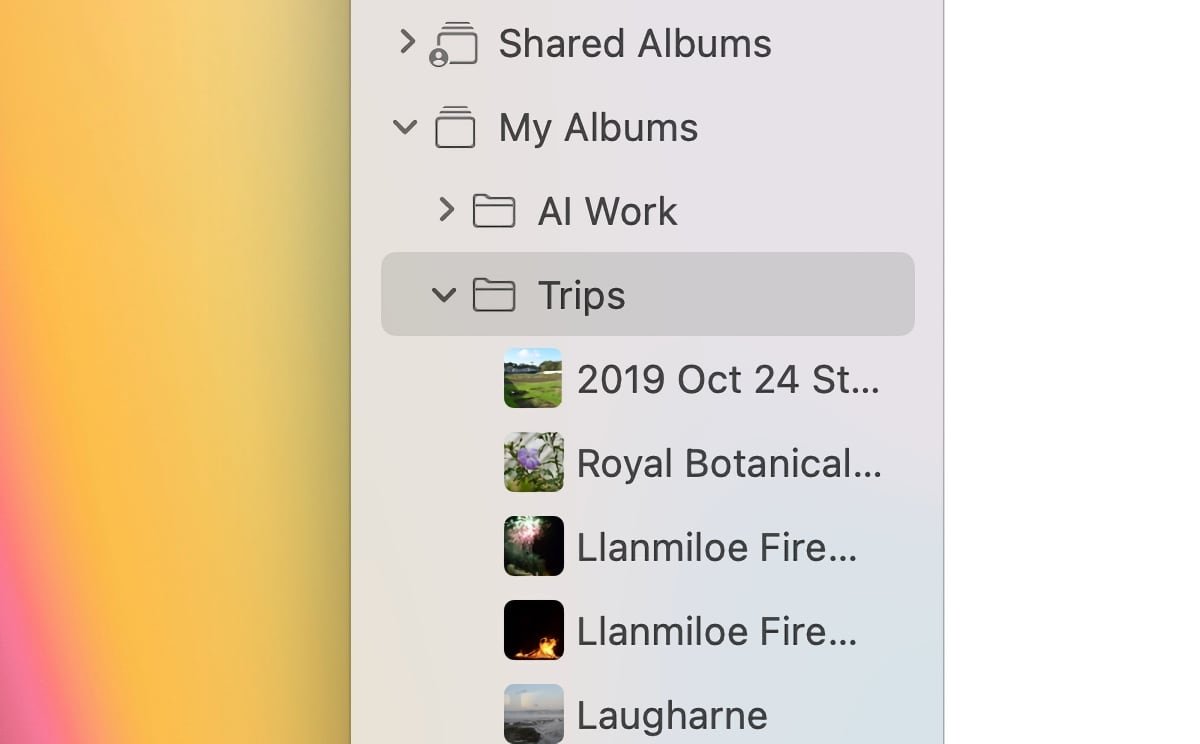
Folders containing albums will appear in the sidebar, and can be collapsed like any other.
How to add and use folders to My Albums in Photos for macOS
- Right-click My Albums and select New Folder.
- Give the folder an appropriate name, such as “Animals” for a folder containing pet albums.
- Drag and drop the albums into the folder.
Once you have added albums to a folder, you can treat them in the same way as albums in the My Albums folder, including sorting and repositioning the albums on the list.
Do bear in mind that, as with photographs themselves, any changes you make to albums, folders, and album orders in Photos for macOS will affect the iPhone and iPad versions of the app as well.